Introducing... The Blogger!

Thursday, November 27, 2014

Tips for All


Today’s topic will be on……. POLYMER CLAY TIPS!


After doing some research, I have come up with a bunch of useful polymer clay tips


1. Squeaky Clean Hand Sanitizer: Most of the times, when working with polymer clay, the clay leaves behind a residue that will not always be washed off with soap and water. Here’s a good tip to get squeaky clean hands!
Put some hand sanitizer on your hands and then wiped them off with a towel. The sanitizer should be alcohol-based because alcohol easily dissolves polymer clay and will leave your hands super clean.


2. Cornstarch? Say What?: Cornstarch actually has many uses when it comes to releasing molds and cleaning up your polymer clay creations. Our hands are needed when working with polymer clay and most of the time, our fingerprints can be left on clay. If you do not want your fingerprints to be all over your creations, use some cornstarch!
Cornstarch makes a great mold release and if you rub some cornstarch on your fingers, this can rid the clay of your fingerprints making your creation look flawless!


3. Yucky Fingerprints: As seen above cornstarch can be used to get rid of fingerprints on your clay. In addition, waterless hand sanitizer or Acetone can be used to clean up fingerprints before baking your clay.
Acetone is found in nail polish but you should only use Acetone as a last resort because after using it on the clay, the clay cannot be reshaped.


4. Cheese grater for canes?: Canes can easily be sliced with a blade but sometimes, this can result in breaking the cane. What is an alternative option?
A cheese slicer can be used to slice canes evenly without breaking it. In order to make thicker slices, you simply need to push harder against the slicer.


5. Nail Polish is a Big NO!: While a lot of people substitute clear nail polish for glaze, it is not a good substitution. Most nail polishes have solvents that will slowly dissolve your polymer clay making it turn sticky.
Instead, just stick with glaze and if you don’t have glaze, that’s fine too! Polymer clay does not always need to be sealed with a glaze although glaze can be beneficial and make your creation appear shinier.


6. Texture Transformation: Is you clay way too soft for your liking? You can change the texture of your clay by leaching it. When you leach polymer clay, the oils in the clay are absorbed making it firmer. Just follow these simple rules to get your clay the way you want it.
Place your polymer clay between two pieces of paper. Place a book on top of it and keep checking the clay occasionally in order to see how your clay is doing. When it is at the right consistency and you like it, simply take the clay out. The longer you leach your clay, the harder it will become. However, you must be careful and check on your clay because if you leach it for too long, the clay will become crumbly and unusable.


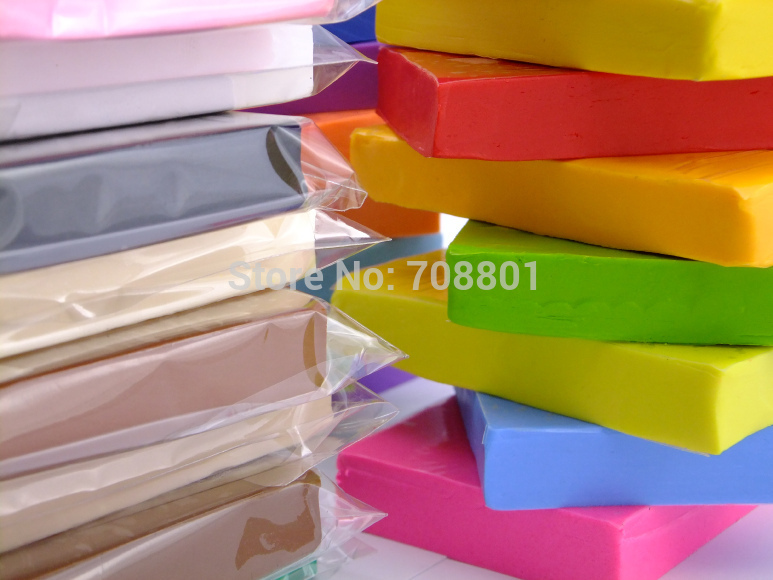
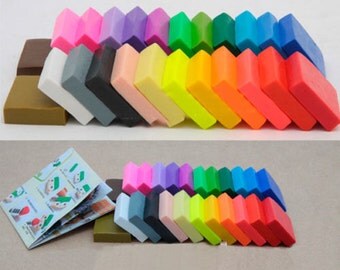
7. Ziploc Storage: Ziploc sandwich bags can be used to store all of your polymer clay. If you store your clay out in the open, some tables might leach your clay while dust will settle on top of the clay. One useful way to keep your polymer clay in a ziploc baggie.
storage for basically everything!

Some plastics will react with polymer clay but ziploc bags are very useful for storing polymer clay and keeping it clean. You can organize your clay too by writing the brand of clay and color of the clay on the outside of the ziploc bag with a sharpie.

Sunday, November 23, 2014

What is Polymer Clay?

November 23, 2014

I have just ordered some supplies online in order to get started on polymer clay making. Now, I am just  hoping that they arrive quickly! Here is the list of some of the things I have purchased:

Polymer Clay Supply List


1. Polymer Clay: To begin with,  polymer clay is obviously needed. Polymer clay can be found in most art stores and the prices vary depending on the area you live in. Polymer clay can also be bought online (Amazon, eBay, online polymer clay sites, etc) which is what I did. Some popular brands of polymer clay include Sculpey, Fimo and Premo.


I purchased some red, yellow and blue clay for myself as I thought that these colors were the most basic to start with. Since these are primary colors, I can easily mix them together in order to obtain other colors that I might need later on. I also bought some brown, white, translucent and black clay as these are some necessary colors. In addition, I also purchased the Polyform Sculpey III Clay Molds Bright which consisted of 12 different polymer clay colors. If you need more colors later on, you can always purchase more and you can always test different brands to find out which ones you prefer.


2. Tools: Some tools are needed so that you can cut pieces of clay and to give texture to your clay creations so they seem more realistic. A blade is needed to cut the clay but you must be careful as blades are sharp.Texture tools aren't necessarily needed as you can always experiment with things you have at home. For instance, if you wrinkle aluminum foil, it can be used to texture the clay and bottle caps can also be used to cut a circular shape.
Some polymer clay tools
I simply bought a art tool set that contained blades for cutting and some other tools to create texture in my creations.


3. Glaze: After you finish baking some polymer clay, you might want to add some glaze to make your creation shinier. This is not exactly necessary but it does give the finished product a better look. The glaze does not actually protect the clay but it just simply makes the clay shinier.  


4. Paint brushes: Paint brushes can have many different jobs as it can be used to texture clay, add details to your creation and more. If you want to paint something on your creation, this is where paintbrushes come in handy. In addition, paint brushes can be used to put on an even coating of glaze on your creations.

5. Paint: I purchased some acrylic paint in order to paint details onto my creations. Once again, this isn't really necessary.

Additional Supplies

1. Work Surface: A clean work surface will be needed where you will feel comfortable while making your clay creations. This can from a table to a tile (polymer clay will not destroy, ruin or stain a tile). If you want, you can use wax paper in order to protect the surface you are working on as the clay can sometimes stain the your work surface.


2. Oven: A toaster oven will be needed to bake your creations as polymer clay does not air dry. As long as you don't bake it, polymer clay will not harden which is why an oven is needed.


Some Supplies You Might Want to Purchase
Basically, these are the supplies that I did not buy but you might want to.


1. Cookie cutters: Cookie cutters can be helpful when you need a round shape or when you want your clay to be a specific shape.

2. Rolling Pin or Pasta Machine: Rolling pins and pasta machines are not needed but simply help with turning the clay into the correct level of thickness in which you want it in.

3. Liquid Clay: Liquid polymer clay is good to use for making things like icing or sticking things together. Liquid clay can be used as a clay softener and is basically a bake-able glue.


This is just a picture some polymer clay and tools. 

Sunday, November 16, 2014

All About Polymer Clay

So... what exactly is polymer clay?


This is simply some background information about Polymer clay such as the history, etc. (The history gets quite boring... so its all right if you skip it but I suggest reading the "Avoid Head, Leaching and Dust" as it is quite useful.)

Polymer clay is a type of hard-enable modeling clay that can be used to model and make basically anything you wish. It is a clay that never air dries and this type of clay only becomes rock hard after you bake it. Polymer clay comes in many different colors ranging from the ordinary blues, yellows, and reds to much more exotic colors.

Avoid Heat, Leaching and Dust
1. Heat: When polymer clay is stored in a hot and humid environment, this will cause the clay to bake partially resulting in a crumbly clay that is unusable.
2. Leaching: Polymer clay contains oils that keep it moist but if the clay is placed on top of a surface with spaces or holes, this can rid the clay of the oils that is needed.
3. Dust: Dust and dirt can settle on the top layer of polymer clay which leaves many marks that cannot be removed from the clay unless the whole top layer of the clay is cut off.


Some popular brands of polymer clay include Fimo, Sculpey, Prosculpt and more.


These cupcakes look delicious!
This is one stunning rose clip!

Polymer clay is fun to play with and can be used to express ideas, mood, etc. They are easy to mold and are similar to the play-dough you have played with as a young child. You can create anything you want out of polymer clay depending on your mood, wants and basically anything. While some people choose to make figurines, dolls and animals other use polymer clay to make charms, bracelets, necklaces and more. The possibilities are endless! Experiment with the clay and let your fingers do the work!


History of Polymer Clay

Polymer clay was first created in the late 1930s in Germany when a woman named Fifi Rebhinder needed a better type of clay in order to make day heads. The formula she used to create the clay was then sold to Eberhard Faber who then used the formula to develop Fimo. This a wide-known brand of Polymer clay we have today!

In Italy around the same time, Monica Resta used another form of clay called LIMMO which was then manufactured by a German company. The German company might have belonged to Rudolf Reiser who was the creator of Formello and Modello.

Polymer clay appeared in America in the early 1970s when the Shaup family immigrated to the United States from Germany and received a Christmas package from their ground mother back in Germany. The package consisted of Fimo and Mrs. Shaup began using the clay to create oprnaments, figures and more. After a while, neighbors and friends began asking her where she had bought the clay. Mr. Shaup who was unemployed at that time saw this as a business opportunity and began to import Fimo from Germany. In 1975, Accent Import also began to import Fimo as its popularity spread in the United States.

I really like that light lavender color. How about you?
While this was going on, a product called polyform was created in the 1960s meant for business purposes. However, this was a fail and a visitor used the product to model a figure. It was then baked and to everyone's surprise, it lead to the creation of another popular polymer clay brand: Sculpey.


By the 1980s, polymer clay was very popular and different colors of polymer clay was being produced. Before that, artists used ground chalk and Tempera colors to decorate their clay.    


The Segals was a family liked polymer clay and taught a lot of people about it. They approached the Sculpey company and suggested that they should make a high quality American clay that consisted of more intense colors and a do-everything formula. Their suggestion was taken into account and from this, Premo was born. Sculpey, Premo and Fimo are three very popular brands of polymer clay used by many everyday people.

(I have also just started polymer clay so I am far from an expert and I have my fair share of research to do. A lot of the information was found on the internet so I give them credit for all their work: I simply rephrased many things in order to make them easier to understand.)